Make a sand/particle game in Pygame
February 03 2026 - 16 Minutes - Source
python - pygame
Hello! Today we will be making a simple sand/particle game in pygame.
Here is the Github repo of the game: Minejerik/sand_game_python
Installing Pygame
First we need to install pygame.
Make sure to have python3 installed first!
IF YOU ARE ON LINUX:
Make sure to create, and activate a virtual environment first
$ python3 -m venv venv # Creating the virtual environment
$ source ./venv/bin/activate # Activating the environment
Once you are ready to install pygame, run:
$ pip install pygame # Installs pygame
Getting Started
It is now time for the fun part, we can start work on the actual game part of the game!
first import everything that is needed
import pygame, sys # Import pygame (for pygame functions) and sys (to exit when requested)
from pygame.locals import QUIT # Import the pygame QUIT function, handles shutting down pygame
Next, define some color variables, this will be helpful later, when we don’t want to write RGB codes anymore
# defining colors
bg_color = pygame.Color(29,29,29)
black = pygame.Color(0, 0, 0)
white = pygame.Color(255, 255, 255)
red = pygame.Color(255, 0, 0)
green = pygame.Color(0, 255, 0)
blue = pygame.Color(0, 0, 255)
The numbers used in the pygame.Color() functions are the RBG values of each color.
RGB values are numbers from 0-255 (1 byte) that represent the amount of red, green, and blue in each color.
For example, white is all colors to the max, (255, 255, 255), while black is no colors, (0, 0, 0).
Next we define the clock, which keeps our project running at a consistent frame rate, without the clock, the game will run at the fastest rate possible, which would be inconsistent based on the usage of the computer.
# Clock for constant FPS
clock = pygame.time.Clock()
Running at a consistent frame rate allows us to make sure that the particles move at the same speed no matter how much the computer is doing.
NOTE, in a game that is harder to run, use deltatime (time between each frame) instead of relying on the clock to maintain constant movement, due to the simplicity of this game, it doesn’t matter
Time to actually make a window!
# Defining the dimensions of the window
WIDTH = 640
HEIGHT = 390

# Starting pygame, getting the display, and setting the caption
pygame.init()
surf = pygame.display.set_mode((WIDTH, HEIGHT))
pygame.display.set_caption('Python Sand Game')
First we define the dimensions of the window, before starting pygame, and setting the caption!
You can change the caption to whatever you want, just replace ‘Python Sand Game’ with what you want.
The caption is the name of the window, shown here:

Now it’s time for the most important part of the game, the main loop.
This processes everything, handling input, and drawing to the screen.
while True:
# Setting dark grey bg color
    surf.fill(bg_color)

# Drawing to the screen
    pygame.display.flip()

# Event Handling
    for event in pygame.event.get():
            if event.type == QUIT:
        # Stop the program if the user wishes to quit
                    pygame.quit()
                    sys.exit()
# Run the game at 60 FPS
    clock.tick(60)
First, this sets the color of the background to the bg_color we defined earlier, then we “flip” the display, which draws everything we’ve updated to the actual window.
Then comes event handling, it iterates over all of the events, if the event is of type QUIT (the user hit the X on the window, wishing to close it), it stops pygame, before telling the system to kill the program, without this, the program will keep running when you try and exit it.
Then the clock from earlier comes back, with the parameter of 60, setting the game to run at 60 FPS, it pauses the loop long enough to not go too far over, but not enough to go too far below, allowing the game to run at, around, 60 FPS.
How long does it have to pause actually?
When a game is running at 60 FPS, like what we try to achieve, it only has 16.67 ms of time to process everything in that frame, to maintain that FPS, so the clock measures how long it has taken to run so far, and splits the difference, pausing execution as long as needed to reach that 16.67 ms target per frame.
The Fun Part
Its time to actually make particles!
Each of our particles is 10x10 pixels
First, lets make a “Grid Map” that will hold the coordinates of all the particles in the simulation, it will be a dictionary, accessed by tuples of coordinates. The map will hold a reference to the object in that position.
grid_map = {} # It is empty, as we do not have any initial objects.
Now lets make a Particle class, it will hold all the information about a single particle.
class Particle:
    def __init__(self, coordinates = (0,0), move_list = [(0, 1), (1, 1), (-1, 1)], color = red):
        grid_map[coordinates] = self
        self.coordinates = coordinates
        self.move_list = move_list
        self.color = color
What is the move_list though?
The move_list is a list of tuples of positions to check, in order.
The default list is
- (0,1) → Down one tile
- (1,1) → Down one tile, and right one tile
- (-1,1) → Down one tile, and left one tile
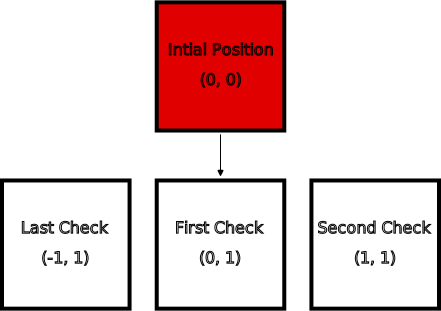
It first checks (0,1) and if it fails, then it checks (1,1), it repeats until it hits the end of the list, which signifies that there are no valid positions for the particle to go. This basic default move_list just allows for a particle to fall, and if its blocked, fall to the sides, in a basic powder-esque way!
This will be used when we get to the update() method.
Speaking of methods:
The particle class methods
First, we need to be able to see our particle.
The draw method
The draw method is fairly straight forward, just allowing the particle to be drawn to the screen.
    def draw(self):
        x = self.coordinates[0]
        y = self.coordinates[1]
        rect = pygame.Rect(x, y, 10, 10)
        pygame.draw.rect(surf, self.color, rect)
It gets the separate x and y from the coordinates, then creates the rectangle (with 10x10 pixel size), before drawing it to the screen.
Lets test now!
We have to quickly make the draw loop in the main object place, and we can get started!
objects = []

objects.append(Particle((0,0))) # Creating a particle at (0,0)
First we need to make the objects list, that will keep track of all particles/objects that need to be updated and drawn, for now we can just add a particle to it manually.
... (inside the main loop)
surf.fill(bg_color)

for obj in objects:
    obj.draw()

# Drawing to the screen
pygame.display.flip()
...
Next we add the drawing loop, which will loop through the objects in the loop, and call the draw() method on them, triggering their drawing.
Testing the draw loop
Now its time to test!
Running the code gets us
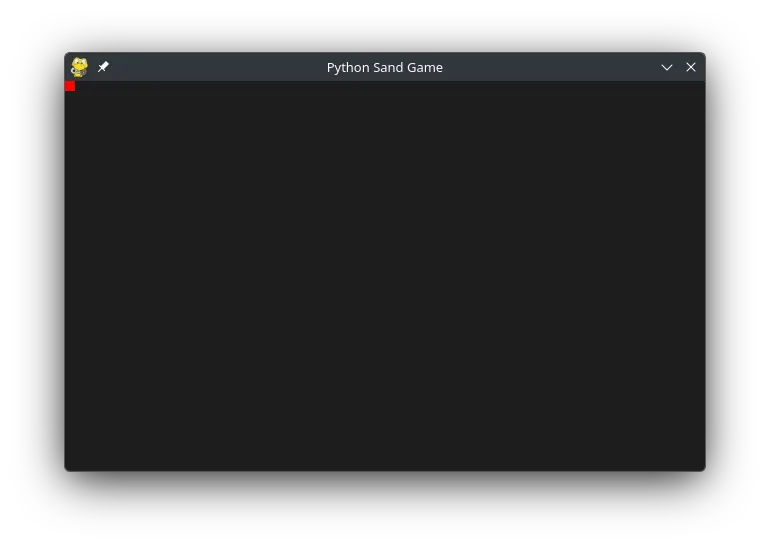
Success!
Now lets try a particle at (10, 10)!
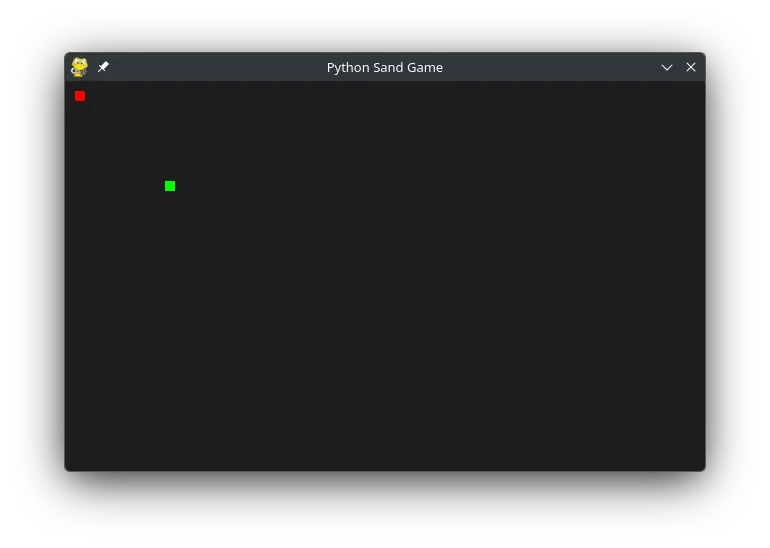
Oh no, the green particle is where its supposed to be, but it is at the red one right now.
How do we fix this?
Screen-space vs Grid-space coordinates
The issue lies with the fact that we are using two different coordinate systems, without converting between the two.
Remember, each of our particles, and thus space in the grid, is 10x10 pixels in size.
We need to convert between the two, which is pretty easy, we just have to multiply X and Y coordinate by 10!
def convert_to_screen_space(pos):
    return (pos[0] * 10, pos[1] * 10)
While we are at it, might as well add the inverse function as well, it is going to be used later on.
def convert_to_grid_space(pos):
    return (pos[0]//10, pos[1]//10) # We are using // for integer division
Now that we have the conversion functions, lets update our draw method to take use of this.
def draw(self):
        # Convert the grid-space coordinates to screen-space coordinates
        x, y = convert_to_screen_space(self.coordinates)
        rect = pygame.Rect(x, y, 10, 10)
        pygame.draw.rect(surf, self.color, rect)
Testing it now, we get the expected result!
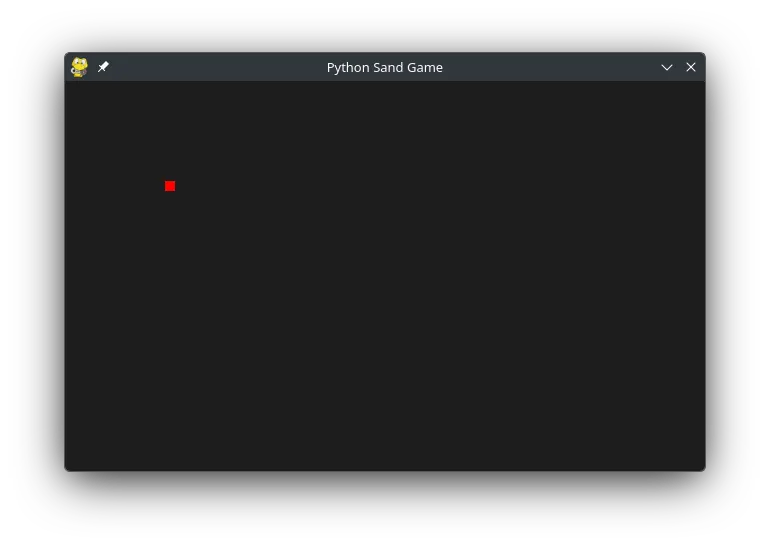
A bunch of floating particles is kind of boring isn’t it, so lets make them move!
It’s time to use the move_list for real! In the:
Update Method
Well, first we have to do some other stuff :(
To actually use the move list, we need to add some tuples, sadly, this is not possible in python by default, so we have to write a simple method to do this for us, for code reuse later on.
def add_tuples(tuple_1, tuple_2):
    return (tuple_1[0] + tuple_2[0], tuple_1[1] + tuple_2[1])
Nice and simple, just adds the first and last values of two tuples, before returning another tuple with the sum!
Now, a more complex, but important, function, the function that checks if a given position is valid or not.
def is_pos_valid(pos):
    # Checks to see if a point in the grid map is valid
    # If the point exists in the map, it is not valid
    if pos in grid_map:
        return False

    if pos[0] >= 0 and pos[0] < MAP_WIDTH:
        if pos[1] >= 0 and pos[1] < MAP_HEIGHT:
            return True

    return False
First, we check if the given position is in the grid_map, if it is, that means that some object is there, so the position is not valid. If that check passes, we have to check if the given position is within the bounds of the map, if it is, the position is valid! If not, it isn’t. Now we are done with the helper methods!
Lets actually do the update method. Its a big method, so we are going to do it step by step!
def update(self):
        new_pos = None
        move_made = False
So, lets get started, we need to define new_pos and move_made both of these will be used later.
new_pos is the possible new position of the particle, it is based on the current particle position, with the offsets defined in move_list It is the variable that gets checked for validity, to prevent the particles from colliding, or a particle to leave the map. move_made is just if a move was made during that iteration in the update loop, if its True it just triggers some clean up code later in the function.
Time to add the actual meat of the method!
    ...
    move_made = False

    for move in self.move_list:
        new_pos = add_tuples(self.coordinates, move)
        if is_pos_valid(new_pos):
            move_made = True
            break
    ...
We loop over all the offsets in the move list, before adding them to the current position, and checking its validity. If it is valid, it just breaks out of the loop, as there is no use to continue iterating, and says that a move was made.
Last little bit of the function!
    if move_made:
        del grid_map[self.coordinates]
        self.coordinates = new_pos
        grid_map[self.coordinates] = self
If the move was made, delete the old coordinates out of the grid_map, marking that space valid for other particles, setting its own position to the found valid position, before setting the new grid_map coordinates!
One last thing before we can run use updates:
The update loop
    for obj in objects:
        obj.update()
Short and sweet, essentially the same as the draw loop, but calling the update() method. It makes sure that each object gets to be updated each frame.
It works!
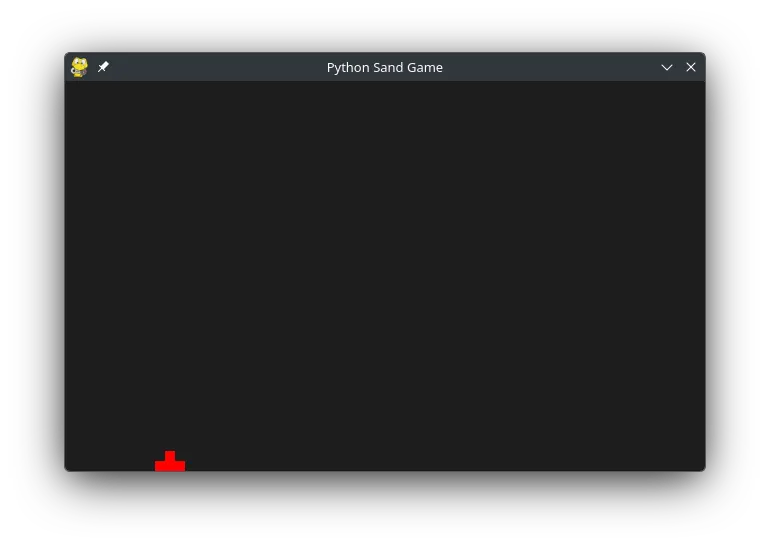
But, it seemed a little quick didn’t it? To fix this, we are just gonna add a small timer, just to make it only update every second frame, not every single one.
Delay Counter
This is a pretty small addition, first define a counter variable as 0 early in the file:
counter = 0
Then just a simple update to the main loop.
    counter += 1

    if counter >= 2:
        for obj in objects:
            obj.update()
        counter = 0
It increments the counter by one every frame, and every time it reaches 2, it resets and updates all the objects, pretty simple, makes it run a bit nicer. Feel free to change the 2 to whatever you like based on preference.
One last thing
Congratulations for making it this far! We are nearly finished, we just need to add user interaction, so they can place and delete particles, then, we are done! If you have any questions, submit an issue to my Github repo, or message me @Minejerik on the HC Slack!
First we got to add the mouse_mode which is the current mode the mouse is in, either none, place, or delete, which changes what the mouse will do.
mouse_mode = "none" # or "place" or "delete"
Next, we have to add the actual user input logic,
    # Event Handling
    for event in pygame.event.get():
            if event.type == QUIT:
                    # Stop the program if the user wishes to quit
                    pygame.quit()
                    sys.exit()
            elif event.type == pygame.locals.MOUSEBUTTONDOWN:
                mouse_pressed = pygame.mouse.get_pressed()
                if mouse_pressed[0]:
                    mouse_mode = "place"
                elif mouse_pressed[2]:
                    mouse_mode = "delete"
            elif event.type == pygame.locals.MOUSEBUTTONUP:
                mouse_mode = "none"
Just update the main loop to look like this. It checks if the input was MOUSEBUTTONUP which is the user unpressing the mouse, if that’s the event that just fired, it resets the mouse_mode to none as that means all mouse user input has stopped, as the program is concerned at least.
It also checks for MOUSEBUTTONDOWN which is when a button, any button, on the mouse is pressed down, it then gets all the mouse buttons currently pressed, and checks if its the left mouse button (0 in the mouse_pressed list), or the right mouse button (2 in the mouse_pressed list). It then sets the mouse_mode to place or delete depending on which one was pressed.
The (second to) last step!
    if mouse_mode == "place":
        pos = convert_to_grid_space(pygame.mouse.get_pos())
        if is_pos_valid(pos):
            objects.append(Particle(coordinates=pos))
    elif mouse_mode == "delete":
        pos = convert_to_grid_space(pygame.mouse.get_pos())

        if pos in grid_map:
            particle = grid_map[pos]
            objects.remove(particle)
            particle.delete()
Add this inside the main loop. It first checks if the mouse_mode is place in which it gets the position, converts it to grid space (I told you we’d use it :3), and if the position is valid, it creates a new particle in that position! next it checks if the mouse_mode is delete , if it is it gets the mouse position, converts it again, then it goes to the grid map, where it gets the particle at the position, if a particle exists in that position, and removes it from the objects list, before calling the delete() method on the particle.
Delete method?
If you paid close attention, you’d realize that the Particle class doesn’t have a delete method, at least not yet.
    def delete(self):
        del grid_map[self.coordinates]
It’s very simple, it just deletes the particles coordinates from the map, that’s it.
And with that, we are finished!!
Ending
Thank you for reading! I hoped you enjoyed!
~~This will soon be posted on my personal website (minejerik.dev) too!~~
Well it is posted here now :3
This was just a tutorial I made for Hack Club Milkyway!
The original can be found here!